

Why ngrok is so awesome for server development
17 Feb 2015One of my favorite development tools is a free open-source command line tool called ngrok. I’ll explain it to you:
Deployment sucks.
Developing locally has its challenges. But then everything gets much more difficult when you need to deploy your work to a server, whether to share with partners, for a demo, or for an external API to POST to.
On most pay-as-you-go server infrastructures – AWS, Heroku, Azure, etc – trying to make changes directly to the remote machines is like working with your hands tied behind your back. The first problem is you have to redeploy every time you want to test something, which can add a frustrating delay. Then your git flow might get in the way, especially if you have files that are .gitignore‘d, like private key files or external libraries, which you don’t want in version control. And trying to run shell scripts on the external server? Yet another level of complexity.

Are you working with multiple backend developers at the same time? Then you need to watch out for conflicting changes before you push over each other, or each set up your own remote development machines.
And if that wasn’t already bad enough, trying to debug issues on these remote machines often feels like you’re blindfolded. You might not have access to the remote machines’s filesystem, or verbose server logs, or performance analytics, or manually inspecting its databases, or whatever it might be. Arrrgh.
ngrok, Our Savior
Thankfully, you can greatly speed up your server development workflow with ngrok.
It only takes about 60 seconds to learn how to use it, but saves a tremendous amount of time.
The magic of ngrok is that it opens up a “reverse proxy” from the outside world onto any port of your machine. As an example, if you’re doing local server development, set to listen on http://localhost:8080, all you need to do is run
ngrok 8080
from a terminal, and ngrok will create a unique new outside accessible url, e.g
http://29b35c15.ngrok.com -> 127.0.0.1:8080

Free and Easy to Get Started
And guess what: it’s free to use, and very quick and easy to get started. If you’re on OS X and already have homebrew, just:
brew install ngrok
See the ngrok.com Download page for installation instructions on other platforms.
Other awesome features
Custom subdomains
You can add a -subdomain=foobar flag when you run ngrok if you want to specify a particular address:
http://foobar.ngrok.com -> 127.0.0.1:8080
https
SSL connections work out of the box, no configuration needed. Just change the protocol from http to https when you type your address into your browser.
Request Replay
If you’re trying to build out tricky requests and responses, check out the ngrok Web Interface (http://localhost:4040 while ngrok is running) and try out the Replay feature to automatically repeat any incoming request, instead of needing to repeatedly curl or use $.ajax or anything like that.
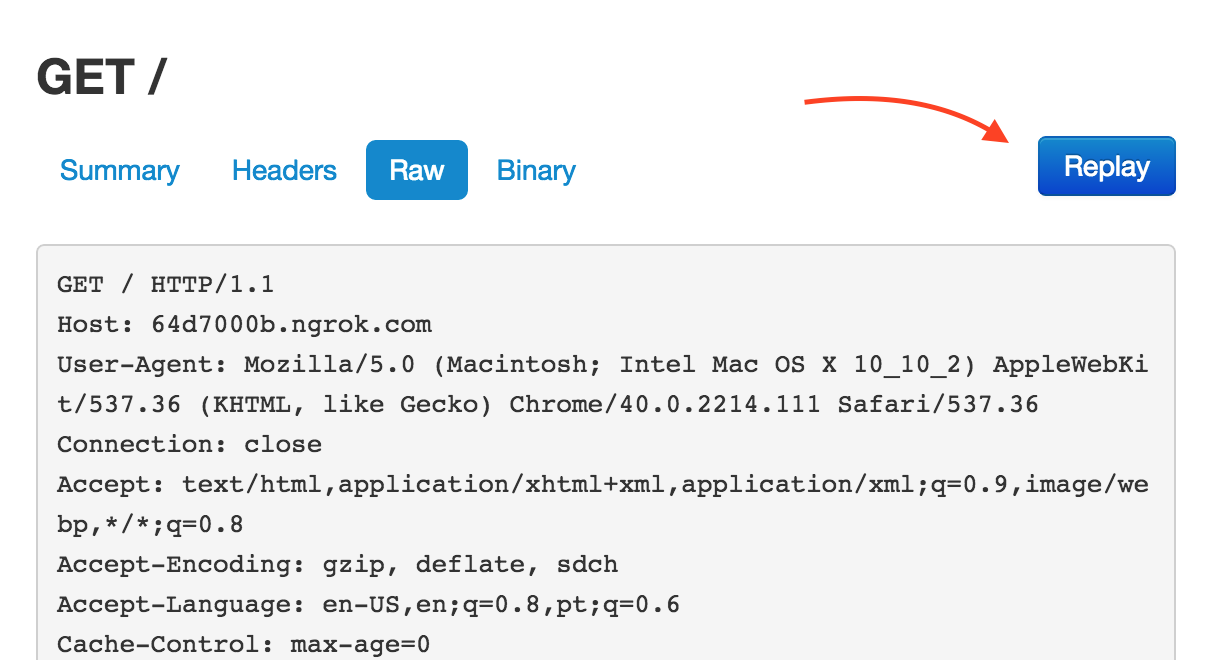
And you can inspect the request and response details each time you do this.
Thanks
There are a bunch of other useful features, so I encourage you to check out the website to learn more: ngrok.com
Thank you for reading. Please leave a comment if you found this helpful, or if you have any other tips you can share.